
Importance of post-renovation cleaning
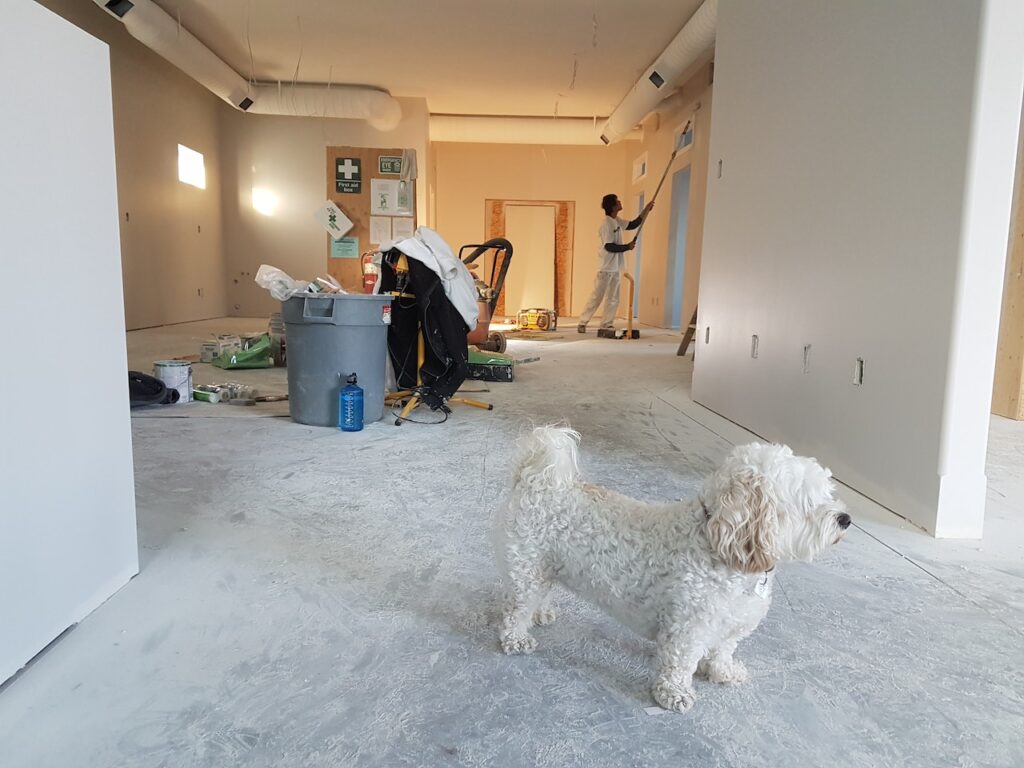
Renovating a space can be an exciting and transformative process. Whether it’s a small home improvement project or a major overhaul, the end result can be truly remarkable. However, amidst the chaos and excitement of renovation, it’s easy to overlook one crucial step: post-renovation cleaning.
Post-renovation cleaning is a vital part of the renovation process, often overshadowed by the anticipation of enjoying the newly transformed space. It involves more than just tidying up and removing visible debris. It encompasses a deep and thorough cleaning that ensures a healthy and safe environment for you and your loved ones.
The significance of post-renovation cleaning cannot be overstated. It helps eliminate the dust, allergens, and other potentially harmful particles that accumulate during the renovation process. From construction dust to paint residue and grout splatters, these remnants can linger in the air and on surfaces, posing health risks and compromising indoor air quality.
Furthermore, post-renovation cleaning helps protect your investment. After investing time, effort, and resources into renovating your space, it’s crucial to preserve the beauty and longevity of the new features. Regular cleaning and maintenance will help maintain the pristine condition of your newly renovated space, ensuring its longevity and adding value to your property.
By adhering to a comprehensive post-renovation cleaning checklist, you can ensure that no corner of your space is overlooked. From the living areas to the kitchen, bathrooms, bedrooms, windows, and floors, each area requires specific attention and cleaning techniques. With the right supplies, techniques, and safety considerations in mind, you can achieve a spotless and healthy environment.
In the upcoming sections, we will delve into the details of post-renovation cleaning. We will explore the necessary preparations, provide a comprehensive cleaning checklist for various areas, share deep cleaning tips and techniques, discuss safety considerations, and offer final touches to ensure that your newly renovated space shines in all its glory.
So let’s roll up our sleeves, put on our cleaning gear, and embark on this post-renovation cleaning journey together, ensuring that your space not only looks stunning but also feels fresh, healthy, and inviting.
Preparing for Post-Renovation Cleaning
After the dust has settled and the last coat of paint has dried, it’s time to tackle the daunting task of post-renovation cleaning. This crucial step ensures that your newly renovated space shines with a pristine finish, free from any lingering debris or residue. To prepare yourself for this undertaking, follow these expert tips and advice to gather the necessary supplies, ensure proper ventilation, and protect surfaces and furniture.
Gather the necessary supplies
Before diving into the post-renovation cleaning process, it’s essential to arm yourself with the right tools and supplies. Creating a checklist of items ensures that you have everything you need within arm’s reach, minimizing any unnecessary interruptions. Consider including the following cleaning essentials on your list:
- Microfiber cloths: These soft and absorbent cloths are perfect for dusting and wiping down surfaces without leaving behind any scratches or streaks.
- Vacuum cleaner with HEPA filter: A vacuum cleaner with a high-efficiency particulate air (HEPA) filter is highly effective in capturing fine dust particles, ensuring a thorough clean.
- Broom and dustpan: This classic duo is excellent for sweeping away larger debris and collecting it neatly in the dustpan.
- Mop and bucket: A mop paired with a bucket of soapy water is ideal for tackling hard floors and removing any grime or dirt.
- Gentle cleaning solutions: Opt for eco-friendly, non-abrasive cleaning solutions that are suitable for various surfaces, such as walls, countertops, and fixtures.
- Rubber gloves: Protect your hands from harsh chemicals and potential allergens with a sturdy pair of rubber gloves.
- Safety goggles: Shield your eyes from any potential debris or cleaning agents by wearing protective goggles.
Remember, having the right supplies at hand will make the cleaning process smoother and more efficient, allowing you to achieve exceptional results.
Ensure proper ventilation
Proper ventilation is of utmost importance during post-renovation cleaning. The process often involves the use of cleaning agents and chemicals that can emit strong odors or fumes. To prevent these odors from lingering and to ensure a healthy indoor environment, it’s crucial to allow fresh air to circulate throughout the space.
Open all windows and doors to promote air exchange, facilitating the removal of any potentially harmful particles or gases. Additionally, consider using fans or air purifiers to enhance air circulation and filter out any remaining dust or pollutants.
By prioritizing ventilation, you not only create a more comfortable environment for cleaning but also contribute to the overall air quality in your newly renovated space.
Protect surfaces and furniture
While post-renovation cleaning aims to restore the cleanliness of your home, it’s equally important to protect surfaces and furniture from accidental damage during the process. Here are a few measures you can take to safeguard your investments:
- Cover furniture: Use plastic sheets or drop cloths to shield furniture and other valuable items from dust, splatters, or cleaning solutions.
- Protect floors: Lay down protective floor coverings, such as rosin paper or cardboard, to prevent scratches or stains from cleaning equipment or residue.
- Mask delicate surfaces: Delicate surfaces, such as woodwork or fragile fixtures, can be masked with painter’s tape or protective film to prevent accidental scratches or dings.
By taking these precautionary steps, you can focus on the task at hand without worrying about potential damage to your cherished belongings.
Now that you’re prepared with the necessary supplies, proper ventilation, and protective measures, it’s time to dive into the comprehensive post-renovation cleaning process. In the following sections, we’ll guide you through a meticulous cleaning checklist for different areas, share deep cleaning tips and techniques, discuss safety considerations, and provide final touches to ensure your renovated space truly shines. Stay tuned!
Cleaning Checklist for Different Areas
Once the dust has settled and the renovation is complete, it’s time to roll up your sleeves and tackle the post-renovation cleaning. Each area of your home requires specific attention to ensure it is sparkling clean and ready for you to enjoy. Let’s dive into the cleaning checklist for different areas:
Living Areas
The living areas of your home, such as the living room, dining room, and family room, are often the most used and visible spaces. Start by dusting all surfaces, including furniture, shelves, and electronics, using a microfiber cloth or a static duster. For hard-to-reach areas, use a vacuum cleaner with a brush attachment. Vacuum upholstered furniture and clean leather pieces with a suitable cleaner. Remember to wipe down all electronics carefully to remove any lingering dust.
Next, clean the windows and glass surfaces in the living areas. Use a glass cleaner or a mixture of water and vinegar to ensure streak-free results. Don’t forget to give the window sills and frames a thorough wipe as well.
Lastly, focus on the floors. Depending on the type of flooring you have, this may involve sweeping, mopping, or vacuuming to remove any dirt or debris. If you have carpets, consider steam cleaning for a deep, refreshing clean.
Kitchen
The kitchen is often the heart of the home, and after a renovation, it’s crucial to give it a meticulous clean. Begin by wiping down all countertops, cabinets, and appliances with a gentle cleaner suitable for the specific surfaces. Don’t forget to clean the inside of the cabinets and drawers as well. Pay special attention to any grout lines and remove any residue using a grout cleaner.
Move on to the appliances. Thoroughly clean the oven, stovetop, microwave, and refrigerator, both inside and out. Use appropriate cleaners and follow the manufacturer’s instructions for each appliance. Degrease the range hood and filters, and clean the sink and faucets to complete the kitchen cleaning process.
Bathrooms
Bathrooms require extra attention when it comes to post-renovation cleaning. Start by cleaning the walls and tiles to remove any dust, grime, or paint splatters. A mild detergent or a mixture of vinegar and water can be effective in tackling these tasks. Be sure to clean the grout lines as well, using a grout brush or an old toothbrush.
Next, focus on the fixtures. Clean the sink, bathtub, shower, and toilet using appropriate cleaners. Pay attention to hard-to-reach areas and corners. Disinfect the surfaces to ensure a hygienic environment.
Finally, clean the mirrors and windows in the bathroom. Use a glass cleaner or a vinegar-water solution to achieve a streak-free shine.
Bedrooms
In the bedrooms, start by dusting all surfaces, including furniture, lamps, and decor. Vacuum the upholstery and mattresses to remove any lingering dust or debris. If necessary, spot clean any stains on the fabric using a suitable cleaner.
Next, clean the windows and glass surfaces in the bedrooms, ensuring they are free from smudges and streaks. Don’t forget to dust and wipe down the window sills and frames as well.
Lastly, clean the floors. Depending on the type of flooring, this may involve sweeping, mopping, or vacuuming. Pay attention to any corners or crevices where dust may accumulate.
Windows and Glass Surfaces
Windows and glass surfaces throughout your home require special attention to achieve a clear and spotless finish. Begin by dusting the frames and sills using a microfiber cloth or a feather duster. Remove any loose dirt or debris.
Next, clean the windows using a suitable glass cleaner or a vinegar-water solution. Wipe the glass in a circular motion to avoid streaks. For larger windows or hard-to-reach areas, consider using a squeegee for a professional touch.
Don’t forget about any glass surfaces in your home, such as glass tabletops or glass doors. Give them a thorough wipe using the same glass cleaner or vinegar-water solution.
Floors
The floors in each area of your home require specific cleaning methods. For hardwood or laminate floors, use a microfiber mop or a vacuum cleaner with a soft brush attachment to remove loose dirt and dust. Avoid using excessive water, as it can damage the flooring. Instead, use a specialized hardwood or laminate floor cleaner sparingly.
For tile or vinyl floors, begin by sweeping or vacuuming to remove any loose debris. Next, mop the floors using a suitable tile or vinyl floor cleaner. Pay attention to grout lines and use a grout brush to remove any stubborn stains or residue.
For carpeted areas, regular vacuuming is essential to keep them clean and fresh. Consider using a carpet cleaner or hiring a professional steam cleaning service to remove deep-seated dirt and stains.
Remember, each area of your home requires specific attention when it comes to post-renovation cleaning. By following this comprehensive cleaning checklist, you can ensure that every corner of your home shines with renewed beauty.
Deep Cleaning Tips and Techniques
Once you’ve gathered your supplies and prepared the space for post-renovation cleaning, it’s time to dive into the deep cleaning process. This section will provide you with expert tips and techniques to ensure that every nook and cranny of your home is thoroughly cleaned. From dusting and vacuuming to removing paint and grout residue, we’ve got you covered.
Dusting and Vacuuming
Dusting and vacuuming are essential steps in the deep cleaning process after a renovation. Dust particles tend to settle on various surfaces, making it crucial to remove them effectively. Start by using a microfiber cloth or a feather duster to gently wipe down surfaces such as countertops, shelves, and furniture. Don’t forget to reach high and low areas, as well as any intricate details that may have accumulated dust.
To ensure a thorough clean, it’s best to follow up with a vacuum. Use an upholstery attachment to vacuum upholstered furniture, curtains, and blinds. For hard surfaces like floors and baseboards, choose an appropriate attachment or setting on your vacuum cleaner. Pay extra attention to corners and crevices where dust tends to accumulate.
Wiping and Disinfecting
After dusting and vacuuming, it’s time to wipe and disinfect surfaces. Use a mild all-purpose cleaner or a solution of warm water and gentle dish soap to wipe down countertops, tables, and other hard surfaces. For disinfection purposes, consider using a suitable disinfectant spray or wipes that are effective against a wide range of germs and bacteria.
When wiping, make sure to use a lint-free cloth or paper towels to avoid leaving behind any residue. Pay special attention to frequently touched areas, such as light switches, door handles, and appliance knobs. These areas can harbor bacteria and germs, so thorough cleaning and disinfection are crucial for a healthy environment.
Removing Paint and Grout Residue
Renovations often leave behind stubborn paint and grout residue that can be challenging to remove. To tackle paint and grout residue, start by scraping off any excess using a plastic scraper or a putty knife. Be careful not to scratch or damage the surface underneath.
For paint residue on hard surfaces, such as tiles or countertops, you can use a paint remover specifically designed for the material. Apply the paint remover following the manufacturer’s instructions, and then gently scrub the area with a soft brush or sponge. Rinse the surface thoroughly with water to remove any residue.
When it comes to grout residue, a mixture of warm water and vinegar can work wonders. Apply the solution to the affected areas and let it sit for a few minutes. Then, scrub the grout lines with a grout brush or an old toothbrush. Rinse the area with clean water to remove any remaining residue.
Polishing Fixtures and Surfaces
The final step in the deep cleaning process is polishing fixtures and surfaces to restore their shine and luster. For metal fixtures, such as faucets and handles, use a suitable metal polish to remove any tarnish or water spots. Apply the polish according to the product instructions, and then buff the fixtures with a soft cloth for a sparkling finish.
When it comes to surfaces like countertops, glass, and mirrors, a good glass cleaner will do the trick. Spray the cleaner onto the surface and wipe it clean using a lint-free cloth or paper towel. For a streak-free shine, consider using a microfiber cloth or a squeegee.
Remember, deep cleaning after a renovation requires attention to detail and a systematic approach. By following these tips and techniques, you’ll be well on your way to a clean and pristine living space.
Safety Considerations
When it comes to post-renovation cleaning, safety should always be a top priority. As you tackle the task of transforming your living space after a renovation, it’s essential to take certain precautions to ensure the well-being of yourself and your loved ones. Here are some important safety considerations to keep in mind:
Handling Chemicals and Cleaning Agents
During the cleaning process, you may encounter various chemicals and cleaning agents that are necessary for removing stubborn stains, grime, and residue. It is crucial to handle these substances with care to avoid any potential hazards. Safely store them out of reach of children and pets, and always read and follow the instructions provided by the manufacturer.
To protect yourself from any potential harm, consider wearing gloves while handling strong cleaning solutions and chemicals. Gloves act as a barrier between your skin and the potentially harmful substances, reducing the risk of skin irritation or chemical burns. They also provide a better grip and help you maintain control while cleaning.
Using Protective Gear
In addition to gloves, there are other types of protective gear that you should consider using during the post-renovation cleaning process. Depending on the type of cleaning tasks you’re undertaking, you may want to wear safety goggles to shield your eyes from dust, debris, or splashing cleaning agents. Additionally, wearing a dust mask or respirator can help protect your respiratory system from inhaling any harmful particles or fumes.
Investing in and utilizing the right protective gear not only ensures your safety but also contributes to a more efficient and comfortable cleaning experience. By taking these precautions, you can confidently tackle the cleaning process while minimizing any potential health risks.
Proper Waste Disposal
As you clean up after a renovation, you’re likely to accumulate a significant amount of waste, including packaging materials, old paint cans, and other debris. Proper waste disposal is essential for maintaining cleanliness and safety in your home. Make sure to separate recyclable materials from non-recyclable ones and dispose of them accordingly.
Some renovation materials, such as paint cans or other hazardous substances, may require special disposal procedures. It’s crucial to check with your local waste management facility or municipality to understand the specific guidelines for disposing of these items safely. By following these guidelines, you can ensure that potentially harmful substances do not end up in landfills or cause harm to the environment.
Remember, safety is paramount during the post-renovation cleaning process. By handling chemicals and cleaning agents with care, using protective gear, and practicing proper waste disposal, you can safeguard yourself and your loved ones while achieving a clean and refreshed living space.
If you’re looking for more tips and tricks to make your post-renovation cleaning journey easier, check out this article on cleaning hacks for post-renovation. It’s packed with valuable insights that will help you navigate through the cleaning process with ease and efficiency.
Final Touches
Once you have completed the post-renovation cleaning process, there are a few final touches to consider to ensure that everything is in tip-top shape. These steps will help you inspect the results of your hard work and determine if you need to hire professional cleaners for any remaining tasks.
Inspecting the Results
Before you declare your cleaning mission complete, take the time to inspect the results. Go through each room and carefully examine the surfaces, furniture, and fixtures. Look for any dust, grime, or residue that may have been overlooked during the cleaning process.
It’s essential to pay attention to details that might have been missed, such as corners, crevices, and hard-to-reach areas. Thoroughly examine the walls, floors, windows, and glass surfaces to ensure they are sparkling clean. Use a bright light or a flashlight to illuminate any hidden spots that may have escaped your initial cleaning efforts.
If you notice any areas that require additional attention, make note of them. This will help you prioritize any remaining tasks and ensure that every nook and cranny is taken care of. Remember, the goal is to achieve a truly pristine and polished space.
Hiring Professional Cleaners if needed
While you may have diligently followed the post-renovation cleaning checklist and done a fantastic job, there are instances where it might be necessary to enlist the help of professional cleaners. Some situations may require specialized equipment or expertise that goes beyond your capabilities.
If you find yourself struggling with stubborn grout residue, tough-to-remove paint splatters, or deep-seated dust in hard-to-reach areas, it may be time to bring in the professionals. Consider hiring a reputable cleaning service that specializes in post-renovation cleaning. These experts have the knowledge, experience, and tools to tackle even the most challenging cleaning tasks.
By outsourcing the cleaning to professionals, you can ensure that every square inch of your renovated space receives the attention it deserves. They will have access to specialized cleaning agents and techniques that can effectively remove tough stains, eliminate odors, and restore the cleanliness of your home.
Remember, the goal is to achieve a clean and fresh environment after the renovation. Hiring professional cleaners can provide peace of mind, knowing that every nook and cranny has been thoroughly cleaned and sanitized.
In conclusion, the final touches of the post-renovation cleaning process involve carefully inspecting the results and considering whether professional cleaners are needed. By paying attention to detail and prioritizing cleanliness, you can ensure that your newly renovated space is truly immaculate.
Conclusion
In conclusion, post-renovation cleaning is an essential step to ensure that your newly renovated space is sparkling clean and ready to be enjoyed. By following the expert tips and advice provided in this ultimate cleaning checklist, you can tackle the task with confidence and achieve outstanding results.
Throughout the article, we have highlighted the importance of post-renovation cleaning and the various steps involved in this process. We began by emphasizing the significance of thorough cleaning after renovations, as it helps eliminate dust, debris, and potentially harmful substances that may have accumulated during the construction phase.
To prepare for post-renovation cleaning, we discussed the necessary supplies you will need, the importance of proper ventilation, and the significance of protecting surfaces and furniture. These steps ensure that you have everything at your disposal to efficiently clean each area of your home.
Speaking of which, we provided a comprehensive cleaning checklist for different areas, including living areas, kitchens, bathrooms, bedrooms, windows and glass surfaces, and floors. Each section offers specific cleaning instructions and techniques to tackle the unique challenges associated with each space.
Moreover, we delved into deep cleaning tips and techniques, such as dusting and vacuuming, wiping and disinfecting, removing paint and grout residue, and polishing fixtures and surfaces. These methods will help you achieve a thorough cleaning and restore the shine to your renovated space.
Throughout the cleaning process, it is essential to consider safety. We discussed the proper handling of chemicals and cleaning agents, the use of protective gear, and the importance of proper waste disposal to minimize any potential risks.
Lastly, we highlighted the importance of inspecting the results of your cleaning efforts and, if needed, considering hiring professional cleaners to ensure a pristine finish. Professional cleaners have the expertise and specialized equipment to tackle even the toughest cleaning challenges.
Remember, post-renovation cleaning can be a time-consuming and labor-intensive task, but the end result is well worth the effort. With the knowledge and guidance provided in this article, you are well-equipped to tackle the cleaning process effectively and efficiently.
Get professional and trusted cleaners from BroomInHand for your cleaning needs in Volusia and Flagler Area. Call us at 386-444-2965 to get 50% off on weekly cleaning today!