
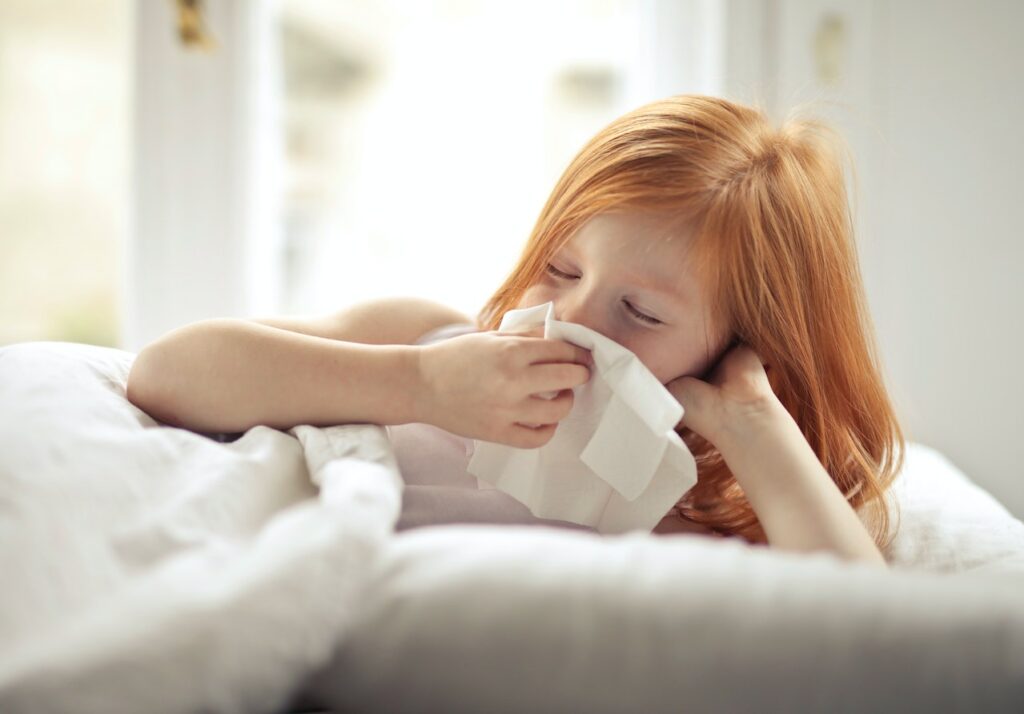

Importance of disinfecting your home after the flu
After a bout of the flu, it’s essential to take proactive measures to disinfect your home. While the flu virus can be relentless, disinfection is your secret weapon in safeguarding your family’s health and preventing the spread of illness. By thoroughly cleaning and sanitizing your living space, you can create an environment that is inhospitable to lingering germs.
During flu season, disinfecting your home becomes even more crucial. The flu virus can survive on surfaces for hours or even days, making it easy to unwittingly come into contact with it. Disinfection not only helps to eliminate any remaining flu germs but also provides you with peace of mind, knowing that you’ve done everything in your power to create a germ-free sanctuary.
In this comprehensive guide, we will walk you through the essential steps for disinfecting your home after the flu. From gathering the necessary cleaning supplies to tackling high-touch surfaces, bathrooms, kitchens, fabrics, personal items, and more, we will equip you with the knowledge and strategies you need to effectively combat the flu virus.
By implementing these proven techniques and incorporating them into your post-flu cleaning routine, you will not only expedite the recovery process but also create a healthier and safer environment for everyone in your home.
So, let’s roll up our sleeves and embark on this disinfection journey together! Get ready to bid farewell to those stubborn flu germs and say hello to a refreshingly clean and healthy home.
Stay tuned for the upcoming sections where we dive into the nitty-gritty of disinfecting your home after the flu. Trust us, cleaning tips for flu season have never been this exciting!
Table: The Importance of Disinfecting Your Home After the Flu
| Section | Key Points |
|---|---|
| Introduction | – Highlight the importance of disinfecting after the flu – Mention the prolonged survival of the flu virus on surfaces – Emphasize the role of disinfection in preventing the spread of illness |
| Step 1 | – Gather the necessary cleaning supplies – Prepare for a thorough post-flu disinfection |
| Step 2 | – Focus on disinfecting high-touch surfaces – Provide instructions on cleaning different surfaces |
| Step 3 | – Address the cleaning and disinfection of bathroom fixtures – Offer tips for maintaining a germ-free bathroom |
| Step 4 | – Discuss the importance of cleaning and sanitizing kitchen surfaces – Highlight the significance of cleaning utensils and appliances |
| Step 5 | – Explain the process of laundering bedding, towels, and clothing – Detail the cleaning and disinfection of soft surfaces and upholstery |
| Step 6 | – Highlight the need to disinfect personal items such as toothbrushes and toys – Provide guidance on sanitizing electronic devices |
| Step 7 | – Stress the importance of ventilating your home – Offer tips for improving indoor air quality |
| Step 8 | – Emphasize the significance of maintaining good hygiene practices – Provide techniques for effective handwashing and proper cough and sneeze etiquette |
| Conclusion | – Recap the essential steps for disinfecting your home after the flu – Reinforce the importance of post-flu disinfection – Encourage readers to implement the strategies discussed |
Now, let’s move on to Step 1: Gather Your Supplies and ensure that you’re equipped with the necessary cleaning supplies for a successful post-flu disinfection!
Step 1: Gather Your Supplies
When it comes to flu-proofing your home, it’s essential to have the right cleaning supplies at your disposal. Equipping yourself with the proper tools can make all the difference in effectively disinfecting your living space and preventing the spread of germs. So, before you embark on your cleaning journey, take a moment to gather the following essential cleaning supplies:
- Disinfectant sprays and wipes: These are your first line of defense against harmful bacteria and viruses. Look for products that are specifically labeled as disinfectants and contain ingredients like alcohol or bleach. These powerful agents can effectively kill germs on a variety of surfaces.
- Disposable gloves: Protecting your hands from direct contact with germs is crucial. Disposable gloves act as a barrier, preventing the transfer of bacteria and viruses from one surface to another. Opt for latex or nitrile gloves if you don’t have any allergies.
- Microfiber cloths: These soft, lint-free cloths are perfect for wiping down surfaces. They are highly effective in capturing and trapping dirt, dust, and germs. Plus, they can be easily washed and reused, making them an eco-friendly choice.
- Paper towels: While microfiber cloths are great for general cleaning, disposable paper towels are ideal for situations that require immediate disposal, like wiping up spills or cleaning heavily soiled areas.
- Trash bags: Having sturdy trash bags on hand is essential for proper waste disposal. When discarding used tissues, disposable gloves, or other potentially contaminated items, seal them in a bag and dispose of them promptly.
- Mop and bucket: For floors that need a thorough cleaning, a mop and bucket are your go-to tools. Look for a mop with a removable, washable head to ensure optimal cleanliness.
- Broom and dustpan: Keeping your floors free of dirt and debris is vital in maintaining a healthy environment. A broom and dustpan combo is perfect for sweeping up larger particles before disinfecting.
- Laundry detergent: Don’t forget about your laundry! Washing bedding, towels, and clothing in hot water with a quality detergent is essential for eliminating any lingering germs.
- Trash can liners: Make sure you have an ample supply of trash can liners to keep your waste bins clean and prevent leakage.
- Personal protective equipment: In addition to gloves, consider wearing a mask and eye protection if you’re handling potentially contaminated materials or using strong cleaning agents.
With these essential cleaning supplies in hand, you’ll be well-prepared to tackle the task of disinfecting your home after the flu. Remember, a thorough cleaning routine is key to minimizing the risk of recontamination and maintaining a healthy living environment.
For a complete flu prevention cleaning checklist and more cleaning tips for flu season, be sure to check out our comprehensive guide on broominhand.com. Stay tuned for the next step in our guide, where we’ll delve into the specifics of disinfecting high-touch surfaces throughout your home.
Step 2: Start with Surfaces
When it comes to disinfecting your home after the flu, paying special attention to surfaces is crucial. High-touch surfaces in particular can harbor a plethora of flu germs, making them potential hotspots for spreading the virus. So, to minimize the chances of reinfection and keep your living environment healthy, it’s essential to properly clean and disinfect these surfaces.
High-touch surfaces refer to commonly used areas that are frequently touched by multiple individuals. These can include doorknobs, light switches, countertops, remote controls, and even cell phones. To effectively disinfect these surfaces, it’s important to gather the necessary cleaning supplies.
Consider having antibacterial wipes, disinfectant sprays, and microfiber cloths at the ready. These tools will aid you in achieving a deep clean and effectively eliminating any lingering flu germs. By using disinfectant products that are specifically designed to combat viruses, you can ensure that your efforts are not in vain.
Now that you have your supplies ready, it’s time to delve into the process of properly cleaning and disinfecting different surfaces. Each surface requires specific attention to ensure effective disinfection. For hard, non-porous surfaces such as doorknobs and light switches, start by wiping them down with an antibacterial wipe or a cloth soaked in disinfectant. Make sure to follow the instructions on the product label for the appropriate contact time needed to kill the flu virus.
When it comes to countertops, use a disinfectant spray and a clean cloth to thoroughly clean the surface. Pay extra attention to areas where food is prepared, as these areas are particularly susceptible to contamination. Don’t forget to wipe down any appliances on the countertop, such as blenders or toasters, as well.
For electronic devices like cell phones and remote controls, it’s important to take extra precautions as well. Consider using disinfectant wipes that are safe for use on electronic surfaces. Remember to remove any batteries or power sources before cleaning and allow the devices to dry completely before use.
Different surfaces require different approaches, so be sure to tailor your cleaning techniques accordingly. By taking the time to disinfect high-touch surfaces throughout your home, you can significantly reduce the risk of reinfection and promote a healthier living environment for you and your loved ones.
Step 3: Don’t Forget the Bathroom
When it comes to disinfecting your home after the flu, it’s crucial not to overlook one of the most important areas—the bathroom. Bathrooms are notorious breeding grounds for germs and bacteria, making them a prime target for thorough cleaning and disinfection.
Cleaning and disinfecting bathroom fixtures
The first step in flu-proofing your bathroom is to clean and disinfect all the fixtures. From the sink to the toilet to the shower, each surface should be given proper attention to ensure a germ-free environment. Start by using a multi-purpose cleaner to remove any dirt or grime. Then, follow up with a hospital-grade disinfectant to kill lingering viruses and bacteria.
Remember to pay special attention to high-touch areas such as faucet handles, toilet flush handles, and doorknobs. These surfaces are frequently touched and can easily transfer germs from person to person. By diligently cleaning and disinfecting these fixtures, you can significantly reduce the risk of spreading the flu within your household.
Tips for maintaining a germ-free bathroom
In addition to regular cleaning and disinfection, there are a few extra steps you can take to maintain a germ-free bathroom throughout the flu season. Consider implementing the following tips:
- Regularly replace hand towels: Hand towels can quickly become a breeding ground for bacteria. To prevent the spread of germs, replace them frequently with clean, dry towels.
- Use disposable wipes: Keep a container of disinfecting wipes handy in the bathroom for quick and convenient cleaning. Wipe down surfaces regularly, especially after someone in the household has been sick.
- Keep surfaces dry: Moisture can promote the growth of bacteria and mold. After using the bathroom, ensure that surfaces are thoroughly dried, including the sink, shower, and toilet area.
- Encourage proper hand hygiene: Remind family members to wash their hands thoroughly after using the bathroom. Proper handwashing is one of the most effective ways to prevent the spread of germs.
By following these tips and incorporating them into your regular cleaning routine, you can create a bathroom environment that is less susceptible to the flu virus and other harmful pathogens.
To learn more about creating a germ-free home and for a comprehensive flu prevention cleaning checklist, be sure to check out Broom in Hand. Their website offers valuable insights and cleaning tips for flu season, as well as guides on house cleaning after being sick and deep cleaning after being sick. Additionally, they provide recommendations for the necessary cleaning supplies for post-flu disinfection.
Step 4: Tackle the Kitchen
Cleaning and Sanitizing Kitchen Surfaces
The kitchen, often considered the heart of the home, is a bustling space where meals are prepared, shared, and enjoyed. It’s also a hotspot for germs, especially during flu season. To ensure a healthy and hygienic environment, cleaning and sanitizing kitchen surfaces is of paramount importance.
When it comes to surface cleaning, it’s crucial to focus on high-touch areas where germs tend to accumulate. These include countertops, cabinet handles, refrigerator doors, and stove knobs. Begin by wiping down these surfaces with a mild detergent and warm water solution. Pay attention to any visible stains or spills, as they can harbor bacteria. For a thorough clean, use a disinfectant specifically designed to kill germs, such as an EPA-approved disinfectant spray or wipes. Follow the instructions on the packaging to ensure effective disinfection.
Different surfaces in the kitchen require specific cleaning methods to maintain their integrity. For example, granite countertops should be cleaned with a gentle, non-abrasive cleaner to avoid damaging the surface. On the other hand, stainless steel appliances can be cleaned with a mixture of mild dish soap and warm water, followed by a wipe down with a microfiber cloth to prevent streaks. Cutting boards should be washed with hot, soapy water after each use, and wooden utensils should be hand-washed to prevent warping.
Importance of Cleaning Kitchen Utensils and Appliances
Kitchen utensils and appliances are often overlooked when it comes to cleaning after the flu. However, they can harbor lingering germs and contribute to the spread of illness. Cleaning kitchen utensils such as knives, spatulas, and serving spoons is essential to maintain a hygienic environment. Ensure that they are thoroughly washed with hot, soapy water after each use. If possible, sanitize them by running them through a dishwasher cycle or soaking them in a solution of one part bleach to nine parts water.
Similarly, cleaning kitchen appliances is crucial for preventing the buildup of bacteria and viruses. Refrigerator shelves and drawers should be removed and washed with warm, soapy water to eliminate any spills or residue. Pay close attention to the door handles and buttons of appliances like microwaves and ovens, as they are frequently touched and can harbor germs. Use a disinfectant wipe or a cloth dampened with a mild cleaning solution to thoroughly clean these surfaces.
| Cleaning Tips for the Kitchen |
|---|
| 1. Focus on high-touch surfaces such as countertops, cabinet handles, refrigerator doors, and stove knobs. |
| 2. Use a mild detergent and warm water solution for routine cleaning. |
| 3. Disinfect surfaces with an EPA-approved disinfectant spray or wipes. |
| 4. Follow specific cleaning methods for different surfaces, like granite countertops or stainless steel appliances. |
| 5. Thoroughly clean kitchen utensils with hot, soapy water and consider sanitizing them. |
| 6. Remove and wash refrigerator shelves and drawers to eliminate spills and residue. |
| 7. Pay attention to frequently touched areas on appliances like microwaves and ovens. |
| 8. Refer to our cleaning tips for flu season and flu prevention cleaning checklist for detailed guidance. |
Step 5: Wash and Disinfect Fabrics
When it comes to flu-proofing your home, washing and disinfecting fabrics is an essential step that should not be overlooked. Laundering bedding, towels, and clothing plays a crucial role in preventing the spread of germs and ensuring a clean and healthy environment for you and your family. Additionally, cleaning and disinfecting soft surfaces and upholstery can help eliminate any lingering viruses or bacteria that may be present.
Laundering bedding, towels, and clothing is a simple yet effective way to remove germs and dirt. Start by gathering all the dirty items and sorting them according to color and fabric type. This will help prevent color bleeding and ensure that each item receives the appropriate treatment.
Select a laundry detergent that is formulated to eliminate bacteria and viruses and follow the instructions on the label. Be sure to use the appropriate water temperature for each load, as certain fabrics may require hot water to effectively kill germs.
After washing, thoroughly dry the items in a dryer or hang them outside in direct sunlight. The heat from the dryer or the UV rays from the sun can help further eliminate any remaining germs.
In addition to laundering, it is important to pay attention to soft surfaces and upholstery in your home. These surfaces can harbor germs and pathogens, contributing to the spread of the flu. Regularly clean and disinfect these areas to maintain a hygienic environment.
To clean and disinfect soft surfaces, start by removing any loose dirt or debris. Use a vacuum cleaner with a brush attachment to thoroughly clean the surface, paying extra attention to seams and crevices where germs can hide.
Next, choose a suitable disinfectant that is safe for the specific fabric or surface you are treating. Follow the instructions on the product label to ensure proper disinfection. Wipe down the soft surfaces, making sure to cover the entire area. Allow the disinfectant to sit for the recommended amount of time before wiping it clean with a damp cloth.
For upholstery, it may be beneficial to consider professional cleaning services, especially if the fabric is delicate or heavily soiled. Professional cleaners have the expertise and equipment to effectively remove dirt, stains, and germs from upholstery, ensuring a thorough cleaning.
By laundering bedding, towels, and clothing and cleaning and disinfecting soft surfaces and upholstery, you are taking proactive steps to eliminate germs and prevent the spread of the flu in your home. These practices, when combined with other essential cleaning measures, create a comprehensive approach to flu-proofing your living space.
Step 6: Pay Attention to Personal Items
When it comes to flu-proofing your home, disinfecting personal items might not be the first thing that comes to mind. However, taking extra care to sanitize items such as toothbrushes, toys, and electronic devices can play a crucial role in preventing the spread of germs and keeping your household healthy.
Disinfecting toothbrushes is an important step in maintaining oral hygiene and preventing the transmission of viruses. After recovering from the flu, it is advisable to replace your toothbrush to avoid reinfection. If you prefer to keep your existing toothbrush, make sure to thoroughly disinfect it. You can do this by soaking it in an antibacterial mouthwash for about 15 minutes or by using a toothbrush sanitizer that utilizes ultraviolet light to kill bacteria and viruses.
Toys, especially those frequently handled by children, can harbor a multitude of germs. To keep them clean and safe, regularly disinfect them with a mild soap and warm water solution. Alternatively, you can use a disinfectant wipe specifically designed for use on toys. Pay extra attention to toys that are shared among children or those that have been in contact with someone who had the flu.
In today’s digital age, electronic devices have become an integral part of our lives. From smartphones to tablets and laptops, these devices are constantly touched and carried around, making them potential carriers of germs. To properly sanitize your electronic devices, start by turning them off and unplugging any accessories. Use a soft, lint-free cloth lightly dampened with a disinfectant spray or wipe to clean the surfaces. Be cautious not to use excessive moisture that could damage the device. Pay special attention to buttons, touchscreens, and keyboards, as these are the areas most prone to harboring germs.
Step 7: Ventilate Your Home
After diligently disinfecting all the surfaces in your home, it’s time to turn your attention to the air you breathe. Ventilating your home is an essential step in ensuring a clean and healthy environment, especially after the flu has made its unwelcome visit. Fresh air circulation not only helps to eliminate lingering odors but also removes airborne particles that may contain harmful germs and viruses.
Improving indoor air quality can be achieved through a few simple tips and tricks. First and foremost, open your windows and let the outside air flow in. Allowing natural ventilation to sweep through your living spaces helps to replace stale air with a refreshing breeze. This influx of fresh air brings with it a multitude of benefits, including the reduction of indoor pollutants and the dispersion of potentially infectious particles.
If weather conditions do not permit opening windows, consider using exhaust fans or air purifiers. Exhaust fans in kitchens and bathrooms are particularly effective in removing moisture and contaminants from the air. They ensure proper ventilation and prevent the buildup of mold and mildew, which can exacerbate respiratory issues.
Air purifiers serve as an additional line of defense against airborne pathogens. These devices work by filtering out allergens, dust, and bacteria, purifying the air you breathe. When selecting an air purifier, look for one with a High-Efficiency Particulate Air (HEPA) filter, as these are designed to trap even the tiniest particles, including viruses.
Moreover, maintaining a clean living environment goes hand in hand with good air quality. Regularly dusting surfaces, vacuuming carpets, and mopping floors can help reduce the amount of dust and allergens floating around. Additionally, keeping indoor plants can improve air quality by naturally purifying the air through a process called photosynthesis.
Remember, circulating fresh air not only aids in eliminating unpleasant odors but also contributes to a healthier living space. By incorporating these tips into your post-flu cleaning routine, you can create an environment that promotes well-being and reduces the risk of reinfection. So, throw open those windows, let the breeze in, and breathe in the revitalizing power of fresh air.
Step 8: Maintain Good Hygiene Practices
As you work diligently to disinfect your home after the flu, it’s equally important to maintain good hygiene practices to prevent the spread of germs and protect yourself and others from getting sick. This final step in the flu-proofing process focuses on handwashing techniques and frequency as well as encouraging proper cough and sneeze etiquette.
Handwashing is one of the most effective ways to prevent the spread of germs. It’s crucial to wash your hands frequently throughout the day, especially during flu season. Make sure to use warm water and soap when washing your hands. Scrub your hands for at least 20 seconds, ensuring that you lather the backs of your hands, between your fingers, and under your nails. Rinse thoroughly and dry your hands with a clean towel or air dryer.
To reinforce the importance of handwashing, encourage your family members and guests to follow proper hand hygiene as well. Place reminders in key areas of your home, such as the kitchen and bathroom, to prompt everyone to wash their hands regularly. By making handwashing a habit, you can significantly reduce the risk of spreading germs and viruses.
In addition to handwashing, it’s crucial to encourage proper cough and sneeze etiquette. Remind everyone in your household to cover their mouth and nose with a tissue or their elbow when coughing or sneezing. Discourage the habit of covering the mouth with the hands, as this can transfer germs to objects and surfaces. Teach children the importance of using a tissue and disposing of it properly, followed by immediate handwashing.
By practicing good hygiene habits, you can create a healthy environment and minimize the chances of reinfection. Consistency is key, so be sure to remind yourself and others to maintain these practices even after the flu season has passed.
Remember, a clean and hygienic home is the first line of defense against the flu and other illnesses. By following the steps outlined in this article, including maintaining good hygiene practices, you can create a safe and healthy living environment for yourself and your loved ones.
Stay healthy, stay clean!
Table: Proper Handwashing Technique
| Step | Action |
|---|---|
| 1 | Wet your hands with warm water. |
| 2 | Apply soap and lather well. |
| 3 | Rub your hands vigorously. |
| 4 | Scrub all surfaces for 20 seconds. |
| 5 | Rinse thoroughly. |
| 6 | Dry your hands with a clean towel or air dryer. |
Conclusion
Recap of the essential steps for disinfecting your home after the flu
In conclusion, after battling the flu, it is crucial to take the necessary steps to disinfect your home and create a clean and germ-free environment. By following these essential steps, you can minimize the risk of reinfection and ensure the well-being of yourself and your loved ones.
First and foremost, gather your supplies. Stock up on cleaning essentials such as disinfectants, gloves, and wipes. These will be your trusty companions as you embark on your flu-proofing journey. Remember, a well-prepared arsenal of cleaning supplies is the key to success.
Next, focus on disinfecting high-touch surfaces. These include doorknobs, light switches, countertops, and remote controls. Pay special attention to areas that are frequently touched by multiple people. By properly cleaning and disinfecting these surfaces, you can eliminate lingering flu viruses and prevent their spread.
Moving on to the bathroom, it is important to clean and disinfect bathroom fixtures. From faucets to toilet handles, these surfaces can harbor harmful bacteria and viruses. Regularly sanitize them to maintain a pristine and germ-free bathroom. Additionally, make sure to implement tips for maintaining a germ-free bathroom, such as replacing toothbrushes regularly and disinfecting shower curtains.
The kitchen, being the heart of the home, also requires special attention. Clean and sanitize kitchen surfaces regularly, as they can harbor bacteria that may compromise your health. Additionally, don’t forget to clean kitchen utensils and appliances thoroughly. Regularly washing cutting boards, knives, and other utensils will help keep your kitchen a safe and healthy space.
When it comes to fabrics, it is essential to wash and disinfect them properly. Laundering bedding, towels, and clothing with hot water and detergent will help eliminate any lingering flu viruses. Moreover, pay attention to cleaning and disinfecting soft surfaces such as sofas, curtains, and carpets. These areas can also harbor germs and should be regularly treated to maintain a germ-free home.
Personal items, such as toothbrushes and toys, should not be overlooked. Disinfect these items regularly to prevent the spread of germs. Additionally, electronic devices, which we often use and handle daily, should also be properly sanitized to maintain a clean and flu-free environment.
Ventilation is another important aspect of flu-proofing your home. Ensure fresh air circulation by opening windows and using fans or air purifiers. This helps remove stale air and reduce the concentration of viruses and bacteria indoors. Improving indoor air quality is vital for a healthy living space.
Lastly, maintaining good hygiene practices is key. Regular and thorough handwashing is essential in preventing the spread of flu viruses. Encourage proper cough and sneeze etiquette, such as covering the mouth and nose with a tissue or elbow, to minimize the transmission of germs.
By following these essential steps for disinfecting your home after the flu, you are taking proactive measures to create a healthy and safe environment for yourself and your family. Remember, prevention is better than cure, and by incorporating these practices, you can significantly reduce the risk of reinfection and promote overall well-being.
For more information on flu prevention and cleaning, check out flu prevention cleaning checklist and cleaning tips for flu season. And if you need a comprehensive guide on house cleaning after being sick or deep cleaning after being sick, be sure to visit our website for helpful articles.
So, let’s roll up our sleeves, grab our cleaning supplies, and embark on the journey of post-flu disinfection. A clean and germ-free home awaits you!
Get professional and trusted cleaners from BroomInHand for your cleaning needs in Volusia and Flagler Area. Call us at 386-444-2965 to get 50% off on weekly cleaning today!